Home > Install Guide > Installation Guide for Door Weatherstrips
Home > Install Guide > Installation
Guide for Door Weatherstrips
Installation Guide for Door Weatherstrips
| See Also: |
||
GENERAL HINT: Check carefully to make sure all clips are lined up with the proper holes before inserting ANY clips in door holes. If the clips are removed or improperly lined up, the rubber may be torn. A) PREPARATION: Remove the old strip in one piece if possible. Remove any old anchor plugs using a pliers. Pushing and popping through any broken pins will also work. |
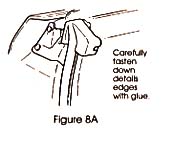
B) CLEANING: Clean the entire door surface and repair any rust spots first. C) INSTALL ONE END: On hardtops and convertibles, fasten one end (Figure 8A), placing a tiny amount of adhesive on the mounting side of the end, and a small amount between pin anchors. On sedans and trucks, start at the top center and apply a small bead of adhesive on the under side of the rubber between the two pins on either side. Then install these pins
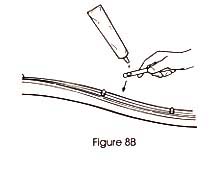
.D) EASY INSTALL: Now simply place a small bit of adhesive to the rubber between pins on the main length of weatherstrip, push pins in and work your way around. (Figure 8B)
|
E) YOUR LAST STEP: On hardtops and convertibles, your strip is made to fit exactly. On sedans and trucks, where lengths of extrusion are used, carefully cut the ends squarely to match together, allowing a 1/4 inch to overlap. At this seam, apply adhesive to the ends of the strip. Hold the ends together a moment and add a samll amount of glue around the edges to get any areas missed. Then allow the seam to fully dry before shutting the door, checking for any oozing glue. F) CHECK: Check your door for alignment. Your SUPERSoft weatherstrip is made to the correct factory specifications. SUPERsoft sponge rubber will adjust to irregularities in doors for a positive seal and ease of closing doors in about a week. |